
A few weeks ago, I began the story of how I made my first two tier cake. Planning a decadent chocolate affair to celebrate my mum and dad’s 25th wedding anniversary, I plotted exactly how I was going to undertake this mammoth task. After testing a delicious but far too rich cake, I went back to the drawing board and pulled out some old favourites to help create Love and Death by Chocolate – The Anniversary Edition.
I rose early, whipping up this Cherry Blueberry Frangipane Tart for that night’s dessert well before 9am, sprinkling with almonds and pressing fat blueberries into the defrosted frangipane, coffee in hand. Although it was a relatively bright day, the weather was kind to this harassed baker, totting up in her head just how many cake tins she would have to line and the sheer amount of chocolate left to chop. A cooling breeze and a little cloud were most welcome.
After the recipe test of the Death by Chocolate Cake, I had decided to return to the drawing board and plump for Edd Kimber’s Ultimate Chocolate Birthday Cake as the base for my two tier construction. Although melted chocolate and cocoa powder combine into a rich and toothsome batter, the resulting cake is moist and possesses a lighter crumb that the density of the tested version.

The three cakes balanced precociously in the oven, the third on a makeshift shelf at the bottom – a grill pan wire rack serving as the ‘emergency chair’ for the oven. I switcherooed and turned the tins until each cake was perfectly cooked then began the task of organising enough wire racks to cool them on. Again, the grill pan rack saved the day.
What better way to sandwich this light cake together with than darkly seductive pools of dark dark chocolate and splashes of whisky? I whipped up a batch using the heated cream and pour over chocolate method and added around 3 to 4 tablespoons of Luke’s kindly donated Angel’s Share. A quick crumb coating and the bottom was ready to go. Time to tackle the top.
Finding a recipe for a loose-bottomed cake tin proved more difficult as my last-minute dash for 15cm tins rustled up the wobbly bottomed variety. Luckily Edd Kimber’s newer cake book Say It With Cake came to the rescue, offering a layered vanilla and chocolate genoise cake tower, which sat at the top of a ‘naked’ wedding cake.
This was my first time making this precarious sponge and I do still have my reservations. A few weeks later and tired from completing an abseil off the coastline cliffs for charity (pause for applause) I rushed around my kitchen attempting to make this delicate sponge come together with all the grace of a bulldozer. Safe to say folding flour into a complex egg structure with the speed of a cement mixer was an utter fail.
Luckily my first occasion was in the daytime devoid of distractions, ropes and hard helmets. Genoise is cooked twice; first on the hob as you whisk egg whites and yolks with sugar until the crystals have dissolved and the mixture begins to warm, before it is baked in the oven. Whirred in my Kmix, the batter become thick and marshmallow like – pillow soft with a tang of yellow from the burst yolks. Flour is carefully folded in before the foamy cake mix is scooped into the tin and baked for a short amount of time. The resulting sponge is super light and often used with air-whipped mousses to create beautiful patisserie, but I plumped for an Italian meringue buttercream speckled with vanilla to sandwich with the chocolate genoise I had baked earlier (simply substituting cocoa for a portion of the flour).
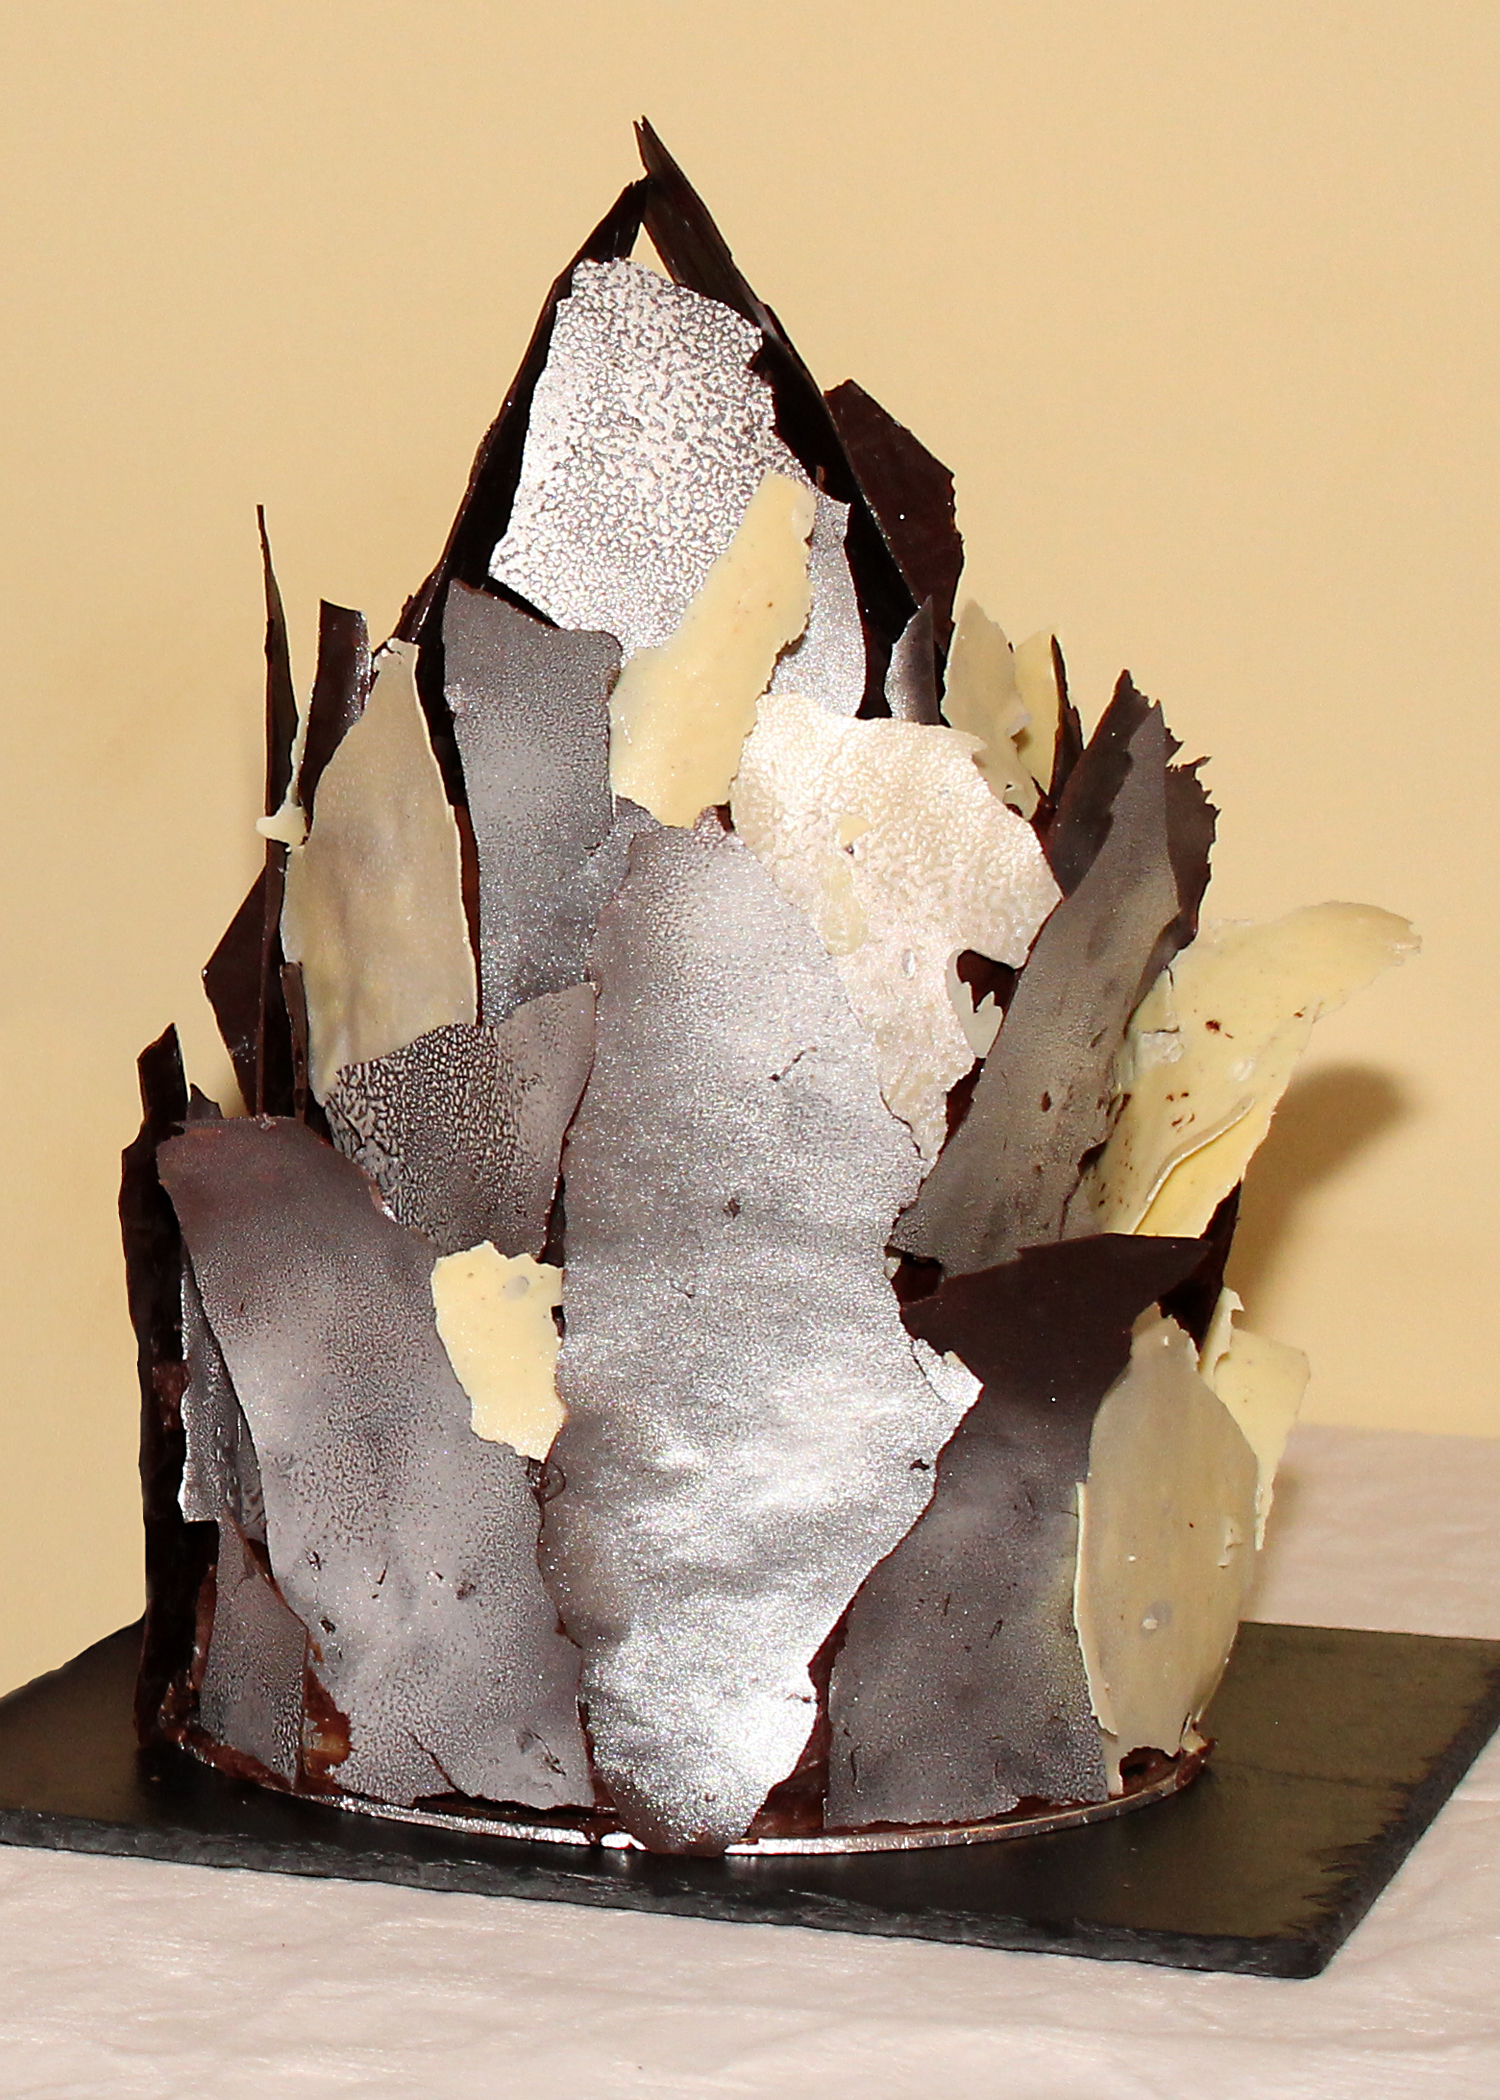
The two cakes were finished. The real headache was the assembly. Luckily I had my own executive chef on hand to offer some amazing advice when I was starting to panic. I made 3 batches of Lily Vanilli’s chocolate shards, sandwiched between greaseproof paper and refrigerated for at least an hour. Then I sprayed with edible silver spray in the garden and broke the pieces into shards. I had only managed to temper one batch and the satisfying snap was made duller by the cruel crumble of the other two. I would highly recommend the best quality chocolate that you can find for this process and stay away from white until you get dark chocolate absolutely perfect.

After some humming and hawing, I decided to skewer the cakes with three cake rods rather than balancing on just-flush supports. I slathered the now two tier cake in another layer of ganache and quickly set about peeling the shards from the baking parchment and trepidly placing along the sides of the cake. Admittedly a few blasts of the chef’s blowtorch were required to get the shards to stick, but the cake was taking shape.
When I finished the outside of the cake, that was when I really lost it. Looking back, I totally understand why I did; I was tired and had been baking solidly since 9am the previous morning. I had also picked an unconventional method of decoration and although it was supposed to look that way I felt it looked messy and uncontrolled. I do still have my reservations about the overall look of the cake, but that has more to do with the shards not being snap-perfect and clean cut. A cry and a hug in the garden resumed my faith and I gathered the last shards, piled them on top and carried the cake into the living room on a slate to be photographed. Finally I could relax.
I want to say a big thank you to my family for really supporting me with this project. Initially worried I had asked too much of myself, mum and dad’s encouragement and last-minute runs to the speciality cake shop were a godsend. David’s advice came in so handy and I am so lucky he was there to help. Luke’s hugs and reassurance were great and everyone who commented and said it looked (and luckily tasted!) great meant so much. And thanks to you for reading this journey – I hope you are inspired to step out your baking comfort zone and tackle a new challenge. I am certainly glad I did.

All images (excluding chocolate cakes on coffee table) by Fiona Ainslie of Memory Lane Photography.

That looks (and I’m sure, tastes) incredible! And what an architectural feat! As always such great lines, “pillow soft with a tang of yellow from the burst yolks,” set my appetite ablaze! You’ve really topped yourself with this one! What’s next? I’m thinking perhaps constructing a chocolate hotel (edible, of course) with cherry cupolas!
Oh Brendan, I think you are my biggest fan! I miss your pizza analogies so much!
That is absolutely amazing! And it looks really professional, well done 🙂
Do the chocolate shards last quite well in this weather?
I’ve just discovered your blog and it’s great! This cake is amazing! It looks too good to cut into! I’ll definitely be checking out the rest of your recipes. I’ve just started my own food blog, http://www.corianderandcumin.wordpress.com – have a look if you fancy 🙂 x
Thanks very much, it was certainly a bit heartbreaking to attack it with a knife after all that work! I like your blog too, that mussel linguine looks delicious!